


Tech Specs
Code Zubi Flyer
In The Box
- Zubi Flyer Frisbee
- Illuminator Printed Circuit Board
- Magnet Wand
- Instructable Booklet
- Happy Face Micro-USB
- Diffraction Glasses (2 Pairs)
- Battery
- Accessory Box
Built-In Features
-
12 Fun Games
Newbie Zubie, Catch the Light, Hot Potato, Copy Cat, Hand Harmonica, Telephone, Pong, RGB Light Hack, RGB Single Light Hack, Shortcut Hack, Mood Light, Name that Tune -
Connect Online
Connect Zubi to a computer to learn coding -
Tactile Building
Physically assemble the flyer - Educational Instructable - Learn how Zubi works, or explore fun facts about electrical current flow and different forms of energy
-
Creatively Explore Light
See light differently with our fun light diffraction glasses, and play with over 16 million hues of color -
Digitally Explore Sound
Control 7 octaves of sound with the buzzer -
Electronics Exploration
Reed & Button Switches, 7 Octave Piezo Buzzer, Circuits & Circuit Board, Microcontroller, Push Buttons, RGB LEDs, Electrical Current Flow, Forms of Energy -
Arduino - Open Source
Our programs are FREE for anyone to use with access to FREE code repositories where you can explore the endless possibilities of coding your Zubi Flyer -
Online Learning Portal
Our FUZE website will have a FREE learning portal that will have a minimum of three courses that will walk you through the process of changing code on your flyer
Electronics Parts
- PC Board
- IC MCU 8BIT 32KB FLASH 44QFN (ATMEGA32U4)
- AUDIO PIEZO TRANSDUCER 30V TH
- 5050 APA102C THREE-COLOR LED SMD
- PHOTOCELL 27-60KOHM
- SWITCH REED SPST-NO 500MA 140V
- TACTILE SWITCH SPST-NO 0.02A 15V
- SWITCH PUSHBUTTON SPST 2A 14V
Microcontroller Specs
The Zubi Flyer is the bomb dot com for makers: 5 PWM pins, 12 DIOs as well as hardware serial connections Rx and Tx. Running at 16MHz and 5V. The onboard switch-mode boost regulator is designed to operate on 3 Volts. Power can be supplied from a 3 Volt CR123A battery or from a USB cable that provides regulated +5 Volts DC to the board. Do not run any power exceeding 5 Volts as the regulator cannot handle step-down voltage.
- ATmega32U4 running at 5V/16MHz
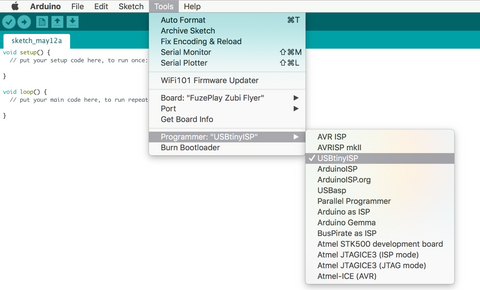
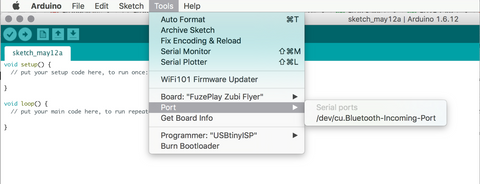
- Supported under Arduino IDE v1.0.1
- On-Board micro-USB connector for programming
- Rx and Tx Hardware Serial Connections
System Requirements
-
Real Code
Learn C -
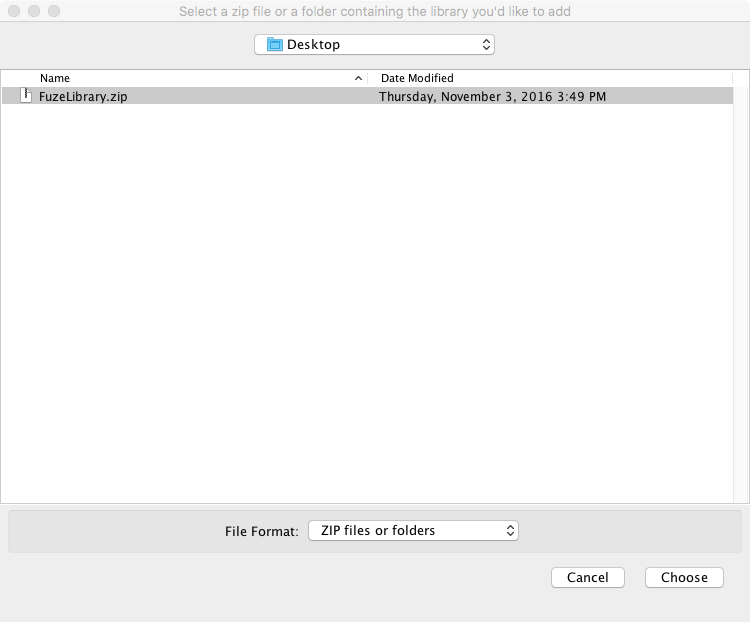
Downloads
Zubi Flyer .ZIP Library
Zubi Flyer Drivers (Windows only) -
Supported OS
Mac + Windows -
PIN Assignments
See PIN Assignments HERE